Reticulated System setup and operation
Learn the essential steps to follow before commencing operation of the base plant, ensuring safe and efficient startup.
Overview
Before commencing the operation of the base plant, it is crucial to follow a set of procedures to ensure the system produces eWater solution correctly. These steps help prevent potential issues and ensure the plant operates smoothly.
Checks before commencing operation
Before starting up your system, we recommend completing the following checks to ensure the system will operate correctly.
1. Check Power & Water Supply
-
Ensure the base plant is plugged into a GPO and the power is turned on.
-
Confirm that the water supply is connected and the valves are open.
-
Check for any leaks or blockages in the water lines.

2. Check Salt Level
-
Open the salt chute door at the front of the system and check that there is an adequate level of electrolyser salt in the brink tank. If required, add salt.
-
We recommend maintaining an adequate supply of electrolyser salt at all times to ensure the system doesn't run out. The system will shut down if it runs out of salt.
-
Purchase more electrolyser salt from our online shop at this link.
3. System Inspection
-
Conduct a thorough inspection of the base plant components, including pumps, tanks, and pipes.
-
Look for any signs of wear, damage, or corrosion that need attention.
4. Reticulation Valve Check
-
Ensure that the tank valves are open to fill the tanks.

-
Ensure that the valves for reticulation are open.

System Startup
The eWater Reticulated System has been designed for ease of use. Once you have completed the system checks, the system is ready for startup and production.
Step 1
-
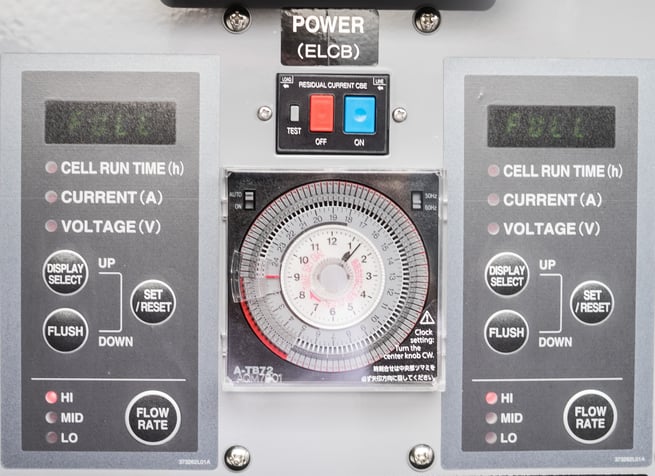
Locate the power switch on the control board and turn it on to power up the system.

Step 2
- Press the ON/OFF switch on the operation panel to start the system. The operation lamp should light up, indicating the system is running.

Step 3
- Wait for the ready lamp to start flashing, which indicates the system is preparing the electrolysed water.
- Once the ready lamp stays on continuously, the system is ready to dispense the cleaning and sanitising solutions.
- The system is now producing eWater. You should be able to hear solution entering the tanks and the Tank level indicator (refer image above) will start to show the tank level. Note that it can take 10-15mins before the low indicator illuminates.
Step 4
- Adjust the flow rate using the flow rate button on the control panel as needed for different applications (e.g., utensils, food).
- Use the AY Faucets or VDW Auto Handwash Dispensers to access the cleaning and sanitising solutions.
Step 5
- Perform initial tests to verify the pH and chlorine levels of the sanitising solution. The recommended chlorine level is 50 ppm, and the pH range should be between 2-4.
- Use test strips to measure these levels and ensure they are within the acceptable range.
In summary, turning on and starting the ROX60 involves checking the power and water supply, verifying salt levels, powering up the system, preparing for operation, dispensing solutions, performing initial testing, and conducting regular maintenance. Following these steps ensures effective operation and optimal performance of the ROX60 eWater system.
For more information or assistance, please contact our support team.
